Materials & Tools: Gear Up for Cardboard Construction!
Before we rev up our engines, let's gather our supplies. The key to a sturdy tractor is using thick cardboard – think appliance boxes or those large shipping cartons! Thicker cardboard significantly improves durability, as recommended by expert crafters. For more advanced designs, check out these tractor plans.
Materials:
- Sturdy cardboard boxes (at least two; different sizes are ideal)
- Scissors or a craft knife (adult supervision required for knives!)
- Strong adhesive (hot glue is great for adults, school glue for younger children)
- Paint (non-toxic, kid-friendly is a must!)
- Markers, crayons, or stickers for decorating
- Optional: Wheels (bottle caps, cardboard circles), additional cardboard for details (like a driver's seat).
Tools:
- Ruler
- Pencil
Safety First: Always supervise young children when handling sharp tools or adhesives. Choose child-safe materials and tools. Smooth any rough edges on the cardboard before letting children handle it. Did you know that even minor cuts can be surprisingly painful for little ones?
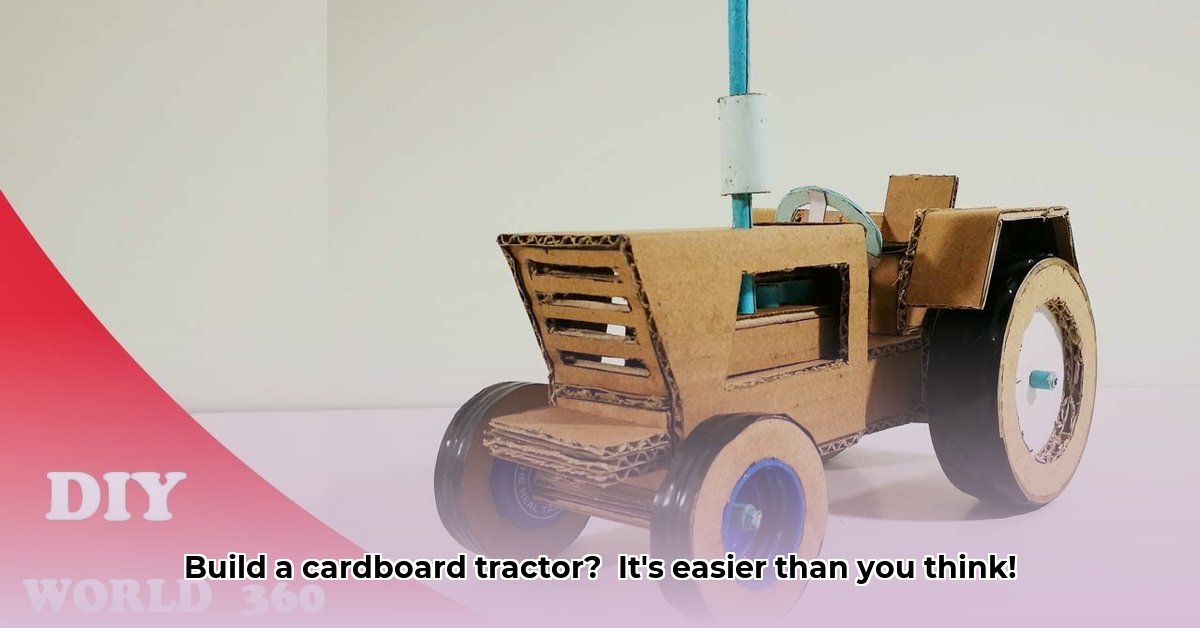
Method A: The Detailed, Durable Tractor (For Older Kids & Grown-Ups)
This method creates a robust, foldable tractor perfect for older children (with adult guidance) or adults who enjoy precision crafting. This method provides a stronger and more durable end product.
Step 1: Planning & Templates: Sketch your tractor design. Consider using printable templates available online; these can streamline the process significantly. Remember, accurate measurements are crucial for a successful build.
Step 2: Cutting & Shaping: Carefully cut and shape the cardboard according to your design. Accurate cuts are essential for a well-fitting tractor.
Step 3: Assembly Time!: Use strong adhesive to firmly join the pieces. Reinforce joints with extra tape or glue for added durability. This method often involves intricate folding techniques for structural integrity.
Step 4: Folding Mechanism: Design a folding mechanism early on. Consider hinges made from sturdy cardboard strips and reinforce connection points for long-lasting use. Careful planning now prevents frustration later.
Step 5: Detailing & Decoration: Add wheels from bottle caps or cardboard tubes, a driver's seat, and other fun features. Let your creativity take the wheel!
Method B: The Quick & Easy Tractor (Perfect for Younger Builders)
This faster approach is ideal for younger children or those seeking a simpler project. While less durable than Method A, it prioritizes quick assembly and creative freedom.
Step 1: Basic Tractor Shape: Cut out a large rectangle from a cardboard box: this is the tractor body. A smaller rectangle can be the cabin.
Step 2: Simple Assembly: Use adhesive to connect the pieces (if adding a cabin). Keep it simple. This method focuses on building a functional tractor quickly using basic shapes.
Step 3: Quick Decoration: Decorate immediately with paint, markers, and stickers. The goal is to let the children express themselves creatively.
Comparative Analysis: Which Method is Best for You?
Choosing between Method A and Method B depends on your child's age, your crafting experience, and the desired durability of the final product.
| Feature | Method A (Detailed) | Method B (Simple) |
|---|---|---|
| Durability | High, long-lasting | Lower, suitable for shorter play |
| Time Investment | Longer | Shorter |
| Skill Level | Intermediate/Advanced | Beginner |
| Customization | Highly customizable | Less customizable |
| Folding Mechanism | Complex, well-defined | Simpler or none |
Customization & Decoration: Unleash Your Inner Artist!
Now comes the fun! Personalize your cardboard tractor with paint, stickers, markers, or even fabric scraps. Add wheels from bottle caps or cardboard tubes. Get creative and let your imagination run wild. Did you know that adding personalized details can significantly enhance a child's engagement with their toy?
Conclusion: Rev Up Your Creativity!
Building a DIY cardboard tractor is a fantastically rewarding activity. It's eco-friendly, affordable, and sparks creativity and problem-solving skills. Remember, the beauty of this project lies in its adaptability. Feel free to experiment, modify, and personalize your design. Get crafting, and have fun!